

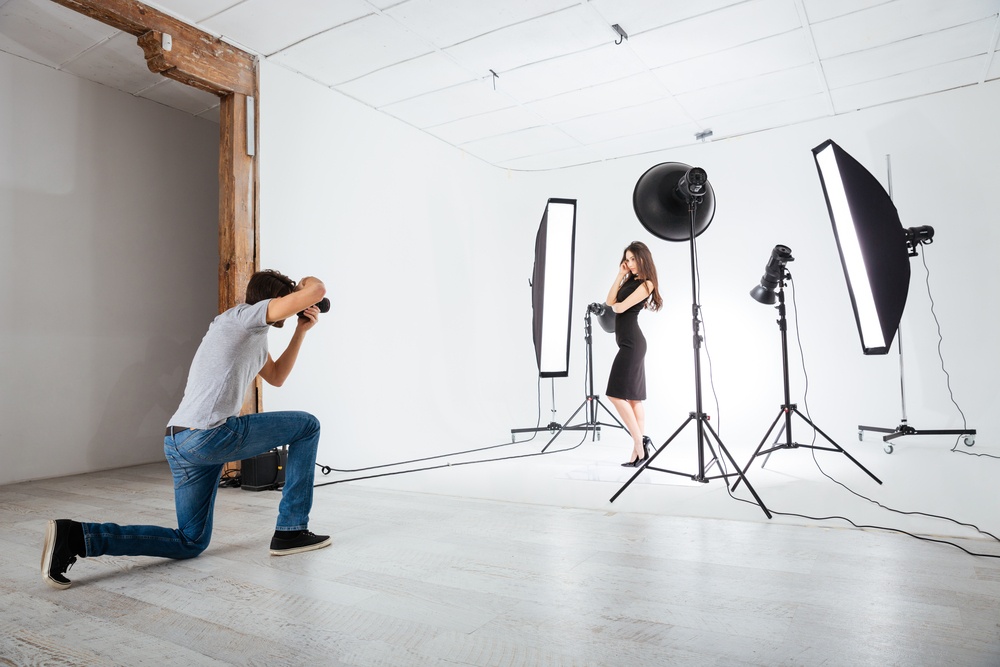
Booking a session in a professional photography studio is a significant investment of time, money, and creative energy. Whether you are capturing corporate headshots, launching a new product line, building a modeling portfolio, or commemorating a personal milestone, a studio environment offers unparalleled control over lighting, backdrops, and overall composition. However, a controlled environment alone does not guarantee exceptional results. The ultimate outcome depends heavily on deliberate preparation, clear communication, and an understanding of how to collaborate effectively with your creative team.
Many clients approach a studio shoot assuming that the photographer handles everything once the camera turns on. While a skilled photographer guides the session, the most successful outcomes are the result of a shared vision. To unlock the full potential of your studio booking, you need a strategic approach that spans the pre-production, active shooting, and post-shoot phases. This comprehensive guide details the actionable steps necessary to ensure your next studio session yields flawless, impactful imagery.
Establishing a Clear Visual Conception
The groundwork for a phenomenal photo shoot is laid long before you step foot inside the studio. Entering a session without a definitive creative direction leads to wasted time, decision fatigue, and disjointed final images.
Developing a Collaborative Mood Board
A mood board is the single most effective tool for aligning your vision with the photographer’s technical execution. Words like sophisticated, edgy, or modern are subjective and mean different things to different people. Visual references eliminate this ambiguity. Gather images that showcase your desired aesthetics, focusing on:
-
Lighting Style: Indicate whether you prefer soft, bright, and airy lighting or dramatic, high-contrast shadows.
-
Color Palettes: Highlight specific color combinations for backdrops, wardrobe, or product styling that complement your brand or personal aesthetic.
-
Posing and Framing: Collect examples of angles, facial expressions, and body language that capture the emotional tone you want to project.
Communicating the Final Destination of the Images
The technical setup of a studio depends heavily on where the final photographs will live. Images intended for a website banner require wide, horizontal framing with ample empty space for text overlays. Conversely, images meant for social media, print magazines, or retail packaging have strict aspect ratio requirements. Inform your photographer of these formatting needs during the planning phase so they can compose shots with the correct dimensions in mind.
Wardrobe and Styling Optimization
Your choice of clothing and styling directly impacts how you look under high-powered studio lights. Studio strobes reveal fine details, textures, and colors with intense clarity, meaning wardrobe choices require careful curation.
Mastering Colors and Textures
Select solid, mid-tone colors that complement your skin tone or brand identity. Neutral tones like navy, charcoal, olive, burgundy, and beige look exceptionally rich under studio lighting. Avoid clothing with busy patterns, prominent logos, or fine pinstripes, as these can create a distracting visual distortion known as the moire effect on camera. Additionally, incorporate textured fabrics like heavy knitwear, silk, linen, or tailored wool, as texture adds depth and visual interest to a flat studio backdrop.
Wardrobe Preparation and Fittings
Camera lenses easily pick up wrinkles, lint, and loose threads, which can add hours to the digital retouching process. Ensure all garments are pressed, steamed, and transported on hangers inside a garment bag. Try on every outfit a few days before the shoot to check for proper fit and comfort. If a garment is ill-fitting or restriction-heavy, it will translate into stiff, uncomfortable body language on camera.
Makeup, Hair, and Grooming Adjustments
Studio flash units tend to accentuate shine on the skin while washing out subtle colors. If you are not working with a professional on-site makeup artist, keep these guidelines in mind:
-
Avoid High-Shine Products: Opt for matte or satin finishes for foundation and powder to prevent harsh hot spots from the flash.
-
Enhance Definition: Apply slightly more defined contour, blush, and eye makeup than you would for daily wear, as studio lights soften features.
-
Manage Flyaway Hairs: Use a light-hold hairspray or pomade to secure loose strands, as backlighting can make stray hairs look like bright halos.
Mastering Posing and Body Language
Standing in front of a professional camera can feel intimidating, often causing people to freeze or adopt rigid postures. Overcoming this stiffness requires a basic understanding of camera angles and body mechanics.
Creating Angles and Separation
When facing a camera directly, the body appears at its widest. To create a more dynamic and flattering silhouette, angle your shoulders slightly away from the lens, shifting your weight onto your back foot. Avoid pressing your arms flat against your torso, as this compresses the upper arms and creates an illusion of extra width. Instead, leave a slight gap between your arms and your waist by placing your hands on your hips, tucking them into pockets, or interacting with a prop.
The Power of Micro-Movements
A common mistake is holding a rigid pose for dozens of consecutive shots. Instead, adopt a fluid approach based on micro-movements. Make tiny adjustments between every click of the shutter. Tilt your chin slightly down, shift your gaze, rotate your shoulders by an inch, or alter your facial expression from a closed-mouth smile to an engaging laugh. This technique provides the photographer with a vast array of subtle variations to choose from during curation.
Understanding and Utilizing Studio Elements
A studio setup offers unique advantages that you should actively leverage during the session to enhance the narrative of your images.
Interacting with Posing Furniture
Most professional studios feature an array of stools, posing tables, apple boxes, and chairs. Do not hesitate to use these tools to break up monolithic standing poses. Sitting allows the body to relax into more natural, casual postures. Lean forward slightly toward the camera when seated, resting your elbows gently on your knees or a table, which creates a sense of intimacy and engagement with the viewer.
Trusting the Tethering System
If your photographer shoots tethered, meaning the camera is connected directly to a computer monitor, take full advantage of this feature. Periodically review the images on the larger screen during breaks. This real-time feedback allows you to see exactly how your outfits are translating on camera, whether your posture looks correct, and if your facial expressions match your goals, letting you make immediate adjustments.
Maximizing Efficiency on the Day of the Shoot
Time moves incredibly fast during a studio booking. Maximizing your results means respecting the schedule and maintaining a highly organized environment.
Arriving Early and Structured
Aim to arrive at least fifteen to twenty minutes before your active shooting time. This buffer allows you to unpack your wardrobe, settle into the space, and consult briefly with the photographer without cutting into your valuable studio hours. If you have booked hair and makeup services inside the studio, ensure you account for that specific timeframe separately so it does not overlap with the camera setup.
Maintaining an Energy Plan
A long photo shoot can be physically and mentally draining. Bring a water bottle and small, non-messy snacks like nuts, fruit, or protein bars to keep your energy levels consistent. Playing background music that matches the mood of the shoot is also an excellent way to maintain a comfortable, high-energy atmosphere in the room.
Frequently Asked Questions
How many outfit changes can I realistically fit into a standard two-hour studio shoot?
In a two-hour session, aiming for three to four distinct looks is generally the sweet spot. This allocation allows roughly twenty to thirty minutes of shooting time per outfit, while leaving sufficient time for quick wardrobe changes and any minor lighting adjustments the photographer needs to make to complement the new look.
What should I do if I am completely inexperienced with posing?
You do not need prior experience to achieve exceptional results. A professional photographer will guide you through every posture, hand placement, and facial expression. The key is to communicate your lack of experience upfront and focus on staying relaxed, following verbal cues, and avoiding holding your breath while posing.
Is it a good idea to bring a friend or family member to the studio shoot for support?
Bringing one trusted person can be highly beneficial if they help you feel relaxed, assist with wardrobe management, or provide positive reinforcement. However, avoid bringing a large group of people, as an overcrowded studio space can create distractions, cause self-consciousness, and slow down the technical workflow of the creative team.
How do studio lights affect the appearance of jewelry and accessories?
Studio flashes can create intense reflections and bright glare on large, highly polished metallic jewelry or glass accessories. It is usually best to opt for minimalist, matte, or brushed finishes. If you want to wear prominent jewelry, bring a few options so the photographer can test how they interact with the light during the initial test shots.
What is the best way to prepare products for a commercial studio photoshoot?
Products must be in absolutely flawless condition. Clean every surface to remove fingerprints, dust, and adhesive residue, as studio macro lenses reveal microscopic imperfections. Bring multiple duplicates of each product in case one item features a manufacturing defect, damaged packaging, or an off-center label.
How long after the studio session does it typically take to receive the final edited images?
The turnaround time varies depending on the photographer’s workload and the complexity of the editing required. Generally, a gallery of unedited proofs is delivered within three to five business days for your selection. Once you select your final images, the detailed high-end retouching process typically takes an additional one to three weeks.
Should I get a haircut or try a new skincare routine immediately before my shoot?
It is highly recommended to avoid any drastic changes directly before a shoot. Get your hair trimmed or colored at least one week prior to allow the style to settle naturally. Avoid trying new skincare products, chemical peels, or tanning treatments within two weeks of your session to minimize the risk of unexpected allergic reactions, redness, or uneven skin tones.

Comments are closed.